So it begins.
Yesterday I attempted to make puff pastry from scratch. I honestly thought I had ruined it. Puff pastry fluffs and rises because the thousand of layers of dough and butter. That's right a thousand but surprisingly it didn't take as long as all that because your layers double or triple each time you fold the dough.
You smash the chilled butter between plastic rap and then lay the butter on your dough so it covers 2/3 of the dough.
You fold it up and you begin to roll it out and fold it over and over. I was going along no problem right up until the butter started to get warm. Suddenly I had butter squirting everywhere and covering the rolling pin and the counter and the dough. I quickly folded it up wrapped it in plastic wrap and put it in the fridge. wondering if it could be saved.
I ultimately asked the internet for help and found this lovely
video. (I recommend her recipe, mine came out of my culinary book and deals with weights only so this one is easier to follow). The only tip this wont give you is that you need to brush excess flour off of the dough before you fold it in on it self.
Now the neat thing about puff pastry is that it needs the layers of butter and dough exposed on the sides. So that it why you trim the enclosed edges off. This is the same dough that became a buttery mess. Thankfully it was salvageable because I was able to fold all the butter back in so only dough was exposed on the outside. Refrigerating the dough between each fold will save you from a buttery death. DO IT.
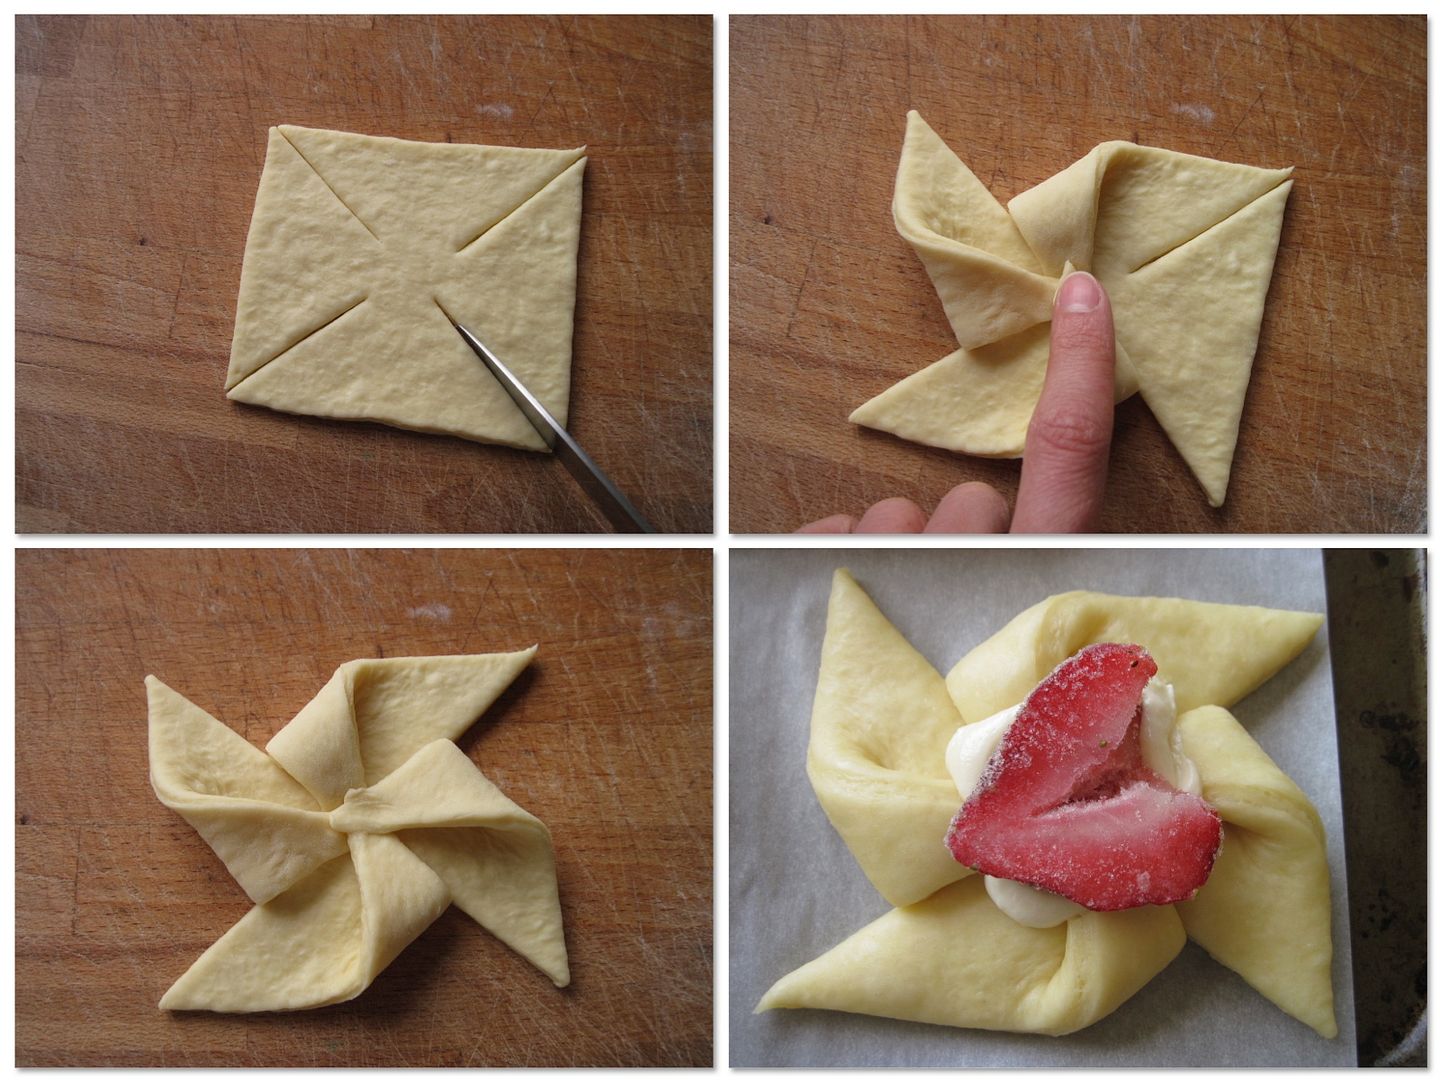
I got fancy here at the end and cut and folded the dough into pin wheels. It's very easy.
The thing to remember when cutting is to use something very very sharp so you don't squish and stick the layers of butter and dough together with the cut. If you squish they don't rise. Also, neat trick, turn the dough over after all the cuts are done and put the top layers on the bottom. Chances are they got a little squished in the cutting process so put them on the bottom to make the top look pretty. That means cutting the pin wheels turning the dough over and
then folding them into a pin wheel shape.
Last tip: Don't touch the freshly cut edges with your fingers. If you touch them they may stick and them the dough doesn't rise.
400 to 425 degrees Fahrenheit for as long as it takes the edges to brown. Make sure you preheat the oven this time. I know there are those of you out there who cheat (like me) and turn the oven on just as I put the stuff in. Don't do it this time. The dough needs instant heat to create the steam so it can rise.
They came out looking almost four times as tall as when they went in! I hadn't ruined them after all! YAY! They cooled really quickly and I topped them with
this delicious cream and my grandfathers raspberry current jam! YUM! Aren't they beautiful! They are so good, and what it better, after all that work making the dough you can wrap it up and freeze it for the next time you want a fancy and tasty treat.
EAT THEM EAT THEM HERE THEY ARE! (don't forget to make something else delicious to use the rest of the cream on. Or just eat it by the spoonful. Who's going to know?) :)




Comments
Post a Comment